Thursday, December 10, 2009

Chocolate Almond Coconut Macaroons

I needed to make a dessert for a church activity and the idea came into my head that something Almond Joy-ish sounded really yummy. So, I came up with this variation of Coconut Macaroons that turned out great! Try this low-fat goody for the holidays!

Chocolate Almond Coconut Macaroons*

2 egg whites
1/2 tsp. vanilla
2/3 c. sugar
1 1/3 cups shredded coconut
Whole almonds
1 cup semi-sweet chocolate chips (Ghirardelli is an awesome brand)

1. Preheat oven to 325º F.

2. In a mixing bowl beat egg whites and vanilla till soft peaks form (tips curl). Gradually add sugar, beating till stiff peaks form (tips stand straight). Fold in coconut.

3. Drop by rounded teaspoons 2 inches apart onto a greased cookie sheet. (The cookies might look small, but they puff up to almost twice their size when baking.)

4. Gently press one whole almond onto the top of each cookie.

5. Bake for about 20 minutes or till the cookies are lightly browned.

6. While the cookies are baking, melt the chocolate chips in the top of a double boiler on medium-low heat. (I used a small pot with water in it and a metal bowl placed inside. Be very careful not to get water in the chocolate! Water will ruin the texture of the chocolate.) As the chocolate melts, stir until it is smooth. Turn the heat to low until ready to use, stirring occasionally.

7. Once the cookies are done, move them to a wire rack with wax paper placed underneath to catch drips.

8. (You can use a cake decorating bag for this next step, but I didn't have one of those.) Take a regular-sized ziploc bag and spoon the warm chocolate into it. Using scissors, snip a tiny hole in the corner - just big enough for a thin stream of chocolate to come out. Squeeze the chocolate until it comes out the hole. Squirt the chocolate out over the cookies using a back and forth motion to stripe the cookies with the chocolate. You can use all the chocolate if you want, but I found I didn't need to. I guess it depends on how much chocolate you like.

9. Allow the cookies to cool completely. Makes about 30.

Variation idea: Fold in a 1/2 cup crushed candy cane with the coconut. Omit the almonds and drizzle the chocolate at the end as normal. Yummy!

*Adapted from a Better Homes and Gardens recipe.


Raw cookies before being baked.


Light golden brown.


Make-shift cake decorating bag filled with warm chocolate.


Coconut Macaroons drizzled with chocolate. Yummm!!!

Thursday, November 19, 2009

Candy Cane Cookies

I was going through my huge stash of loose recipes trying to condense and throw away the ones I know I'll never make. (Cheesecake with quince compote? Come on, really now.)
Anyway, I ran across an old, old family favorite from my mom's dismantled Betty Crocker cookbook from like the '60s. The book is long gone now so I only have a small collection of the pages. Anyway, the recipe is for Candy Cane Cookies. As a fun tradition we would make these cookies every Christmas. It's been years since I've had them so I was really excited to find the recipe again! I can't wait until Christmas so this week my son and I are making cookies! I just had to share it, so here it is:


Candy Cane Cookies

1 cup sugar
1 cup butter or margarine, softened
1/2 cup milk
1 teaspoon vanilla
1 teaspoon peppermint extract
1 egg
3 1/2 cups Gold Medal® all-purpose flour
1 teaspoon baking powder
1/4 teaspoon salt
1/2 teaspoon red food color
2 tablespoons finely crushed peppermint candies
2 tablespoons sugar
1. Stir together 1 cup sugar, the butter, milk, vanilla, peppermint extract and egg in large bowl. Stir in flour, baking powder and salt. Divide dough in half. Stir food color into 1 half. Cover and refrigerate at least 4 hours.
2. Heat oven to 375ºF.
3. Stir together peppermint candy and 2 tablespoon sugar; set aside.
4. For each candy cane, shape 1 rounded teaspoon dough from each half into 4-inch rope by rolling back and forth on floured surface. Place 1 red and white rope side by side; press together lightly and twist. Place on ungreased cookie sheet; curve top of cookie down to form handle of cane.
5. Bake 9 to 12 minutes or until set and very light brown. Immediately sprinkle candy mixture over cookies. Remove from cookie sheet to wire rack. Cool completely, about 30 minutes.

(Here's the link if you want the recipe from the Betty Crocker website.)

My mom mentioned to me a variation: dye half the dough red, the other half green. Twist the two different colored ropes together like you do for the candy canes, only form them into a circle for a wreath! I think I'm going to try both versions.

Thursday, October 15, 2009

Ode To Fat

I could wax poetical about butter, but I've decided to talk briefly about oil - more specifically about deep-fat frying. See, the health world sees frying as bad, and I'm sure it is. I don't think it's wise to eat a ton of fried foods; in fact too much makes my stomach hurt. But I think there should be special occasions where eating fried food is not only accepted, but it is celebrated! Here is a list of fried foods that I absolutely love.

Around the campfire: fried refrigerator biscuits served hot with apple butter

At home with a good pot of chili: fried hush puppies

For dinner or at a good English pub: fish and chips

As a snack: Homemade fried corn tortilla chips with fresh, homemade refried beans

Aaaaah, they make my mouth water! Since I have some freshly made apple butter I am going to have to make those fried biscuits. It's been absolutely years since I've had them. That's enough justification, right? Now all I need is a special occasion. Let's see... Halloween is the next holiday. Let's celebrate!

Saturday, October 10, 2009

Delicious Granola


Granola has been one of those other intimidating things that I screwed up once (a whole batch burnt - that's a lot of granola wasted) and have been scared to try since. This was really silly because granola is really easy - if you have a good recipe.

Well, a few weeks ago, in talking to a sweet, older lady whose grandkids gobbled up her granola I dared to ask for her recipe and tried it out. It was fabulous! I then created a variation of my own using the same basic principles. You should really try this out. It makes a lot which you can store in a plastic container or in glass mason quart jars and you have an amazing breakfast that is cheap and fast to make. Here is the recipe:

Sarah's Granola

7 c. rolled oats (not instant)
1 c. chopped or sliced almonds
3/4 c. pecans, chopped
1 c. shredded coconut
1/4 c. brown sugar
1/2 tsp. salt
1 tsp. cinnamon

1/2 c. canola or vegetable oil
1/2 c. honey
1 tsp. vanilla extract

1 1/2 c. dried cranberries (or raisins)

Preheat oven to 300ºF. Spray two jelly roll pans/cookie sheets (the kind with a 1/2" lip all around) with cooking spray.

In a large bowl, mix together by hand the rolled oats, almonds, pecans, coconut, brown sugar, salt, and cinnamon. Next add the oil, honey, and vanilla. Continue to mix by hand, digging to the bottom and bringing it up to the top to help all ingredients to circulate well. Break up any over-large clumps. Mix until well combined. (Do not add the cranberries or raisins at this point. If they bake with the granola they will end up as hard as rocks.)

Spread the mixture evenly onto the two cookie sheets. Bake 20 minutes. Stir and rotate pans. Bake for another 20 minutes or until mixture is golden brown. Remove from the oven and stir the granola around, otherwise it will stick horribly.

After the granola has cooled for five minutes, dump the granola back into the large bowl and mix in the dried cranberries or raisins. Enjoy plain or with milk! Once completely cool, store granola in a cool, dry place.

***Note: Feel free to add or remove the add-ins and spices with your own favorites. On my last batch I added nutmeg and cardamom. Here are some more suggestions:

*raw sunflower seeds
*flax seeds
*walnuts
*pumpkin seeds
*dried bananas
*dried apples
*nutmeg
*cardamom
*ginger
*allspice
*pumpkin pie spice
*almond extract

Get fancy! Have fun!

Monday, October 5, 2009

Triumphant Mozzarella Cheese

At last! I have made a successful mozzarella cheese. Go to my homesteading blog here to read about my long awaited triumph!

Sunday, October 4, 2009

Baking Pumpkins

In October 2005 I bought some pumpkins and attempted to bake and puree them to store in the freezer. It was horrible. I had to keep adding water so the blender wouldn't choke up and then the pumpkin was so watered down it hardly tasted like pumpkin anymore. Needless to say I never tried baking pumpkin again. Until today.

Four years later I'm at the store and see sugar pumpkins for sale. They have this huge sticker on the bottom. I take a peek and it's a sticker telling me how to bake the little suckers! It was a brilliant marketing tool because I bought three. I realize now that I could have looked it up online long ago, but, well, I just didn't.

Baking pumpkin from scratch is no picnic. You have to cut out the stem, slice the thing in half and scoop out the innards. The scooping and scraping is what takes a goodly amount of time and elbow grease. You're probably wondering why I don't just behave like a normal person and get my pumpkin with the maximum effort of cranking a can opener. But let me tell you. After scraping the heck out of those pumpkins, setting them in to bake, having the pumpkiny aroma waft through my house, and then having the satisfaction of mashing the beautiful golden flesh to a happy mushiness was all I needed to tell myself that I would do it all again in a heartbeat; not to mention the delicious side benefit of munching the roasted pumpkin seeds.

So, I share the recipe I used that I should have had all those years ago. I will never be pumpkinless again in the fall. Even if there are backup cans of pumpkin on my shelf. :-)

Baked Pumpkin
Cut pumpkin in half without the stem. Scoop out the seeds and strings. (Easier said than done. HA!) Lightly grease foil or spray with cooking spray. Place cut down on foil lined baking sheets. Cover with foil. (I didn't, but it turned out fine.) Bake 350ºF until tender - 1 1/2 hours. Cool. Scoop out flesh and mash with potato masher until smooth. Drain if too watery.
Mashed pumpkin will hold 5 days in the refrigerator or you can freeze it.

**Note: It's almost impossible to get all the strings off the pumpkin. I scraped until I was too tired for perfection, and then as I mushed it up after baking I kept an eye out for any stringiness. It all turned out fine, so just do your best and don't worry if it's not perfect!

To use in a pie:

1 1/3 c. smooth pumpkin
1 1/3 c. sweetened condensed milk
1 egg
1 1/4 tsp. cinnamon
1/2 tsp. nutmeg
1/2 tsp. ginger
1/4 tsp. cloves
1 c. hot water

Mix all ingredients until well combined. Pour into 9" pie shell. Bake at 375ºF for 55 to 65 minutes. (Center will still move slightly.) Cool and enjoy.

Baked Pumpkin

Scooping out the baked pumpkin flesh.


Mashed pumpkin - isn't it a beautiful color?

Wednesday, September 16, 2009

Instead of Canned Soda...

I just think this is brilliant for personal sized beverages on the go made in the comfort of your own home. Check it out HERE. Great idea, Jenna!

Apple Butter

Another one of my fall favorites is apple butter. Growing up it was a staple, especially in the autumn when the apples were in season. If you ever get the chance to make this, please do, because it is so delicious and unique a spread. And it's fat free! The "butter" just refers to its spreadable consistancy like peanut butter. If you'd like to read more of my musings on this wonderful stuff, read about it on my homesteading blog HERE.

Apple Butter*

6 pounds tart cooking apples, cored and quartered (18 cups) (I also like to use different types of apples to give it a more complex flavor.)
6 cups apple cider or apple juice (If you can, use apple cider - the non-see through kind usually only available when in season. Cider just has a richer flavor.)
3 cups sugar
2 tsp. ground cinnamon
1/2 tsp. ground cloves
1/2 tsp. ground allspice

1. In an 8 or 10-quart kettle or large pot, combine apples and cider or juice. Bring to a boil; reduce heat. Cover; simmer for 30 minutes, stirring occasionally. Press through a food mill. (You should have about 13 cups pulp.)

2. Return pulp to kettle. Stir in sugar, cinnamon, cloves, and allspice. Bring to boiling; reduce heat. Simmer, uncovered, about 2 hours or till very thick, stirring often.

3. Spoon hot apple butter into hot, sterilized pint or half-pint jars, leaving a 1/4-inch headspace. Adjust lids. Process in boiling-water canner for 5 minutes. Allow to cool. Once opened, keep refrigerated.

Makes about 8 half-pints.

Sunday, September 13, 2009

Beef Stew

In honor of my wishful thinking that autumn were here, I've decided to post my favorite beef stew recipe. I actually only have one recipe, but it's turned out so wonderfully every time I make it that I haven't tried looking for another. I made some just yesterday and it's just so warm, filling, and savory - and it goes great with a chewy, crusty baguette and a hunk of yummy cheese! (Side note: I tried a new, lovely French cheese called Belvedere Tomme. It has an apple cider rind and a hint of apple flavor to the cheese which was also very fragrant, but it was oh, so delicious. It's so much fun trying new cheese!) Okay, on to the recipe.


Beef Stew*

1 pound beef or pork stew meat (I get whatever is on sale)
2 Tbsp. cooking oil
3 1/2 - 4 cups vegetable juice cocktail (I have to open a big can of the juice, so I try to use as much of it as I can!)
1/2 cup chopped onion
2 tsp. instant beef bouillon granules or Better Than Bouillon Beef Paste (the paste is awesome!)
2 cloves garlic, minced
1/2 tsp. dried basil, crushed
1/2 tsp. dried thyme, crushed
2 1/4 cups cubed, peeled potatoes
2 cups sliced carrots
1 cup sliced celery
2 Tbsp. all-purpose flour


1. In a large saucepan brown meat in hot oil. In a medium to large pot put in the meat cubes, add juice cocktail, onion, bouillon granules, garlic, basil, and thyme. Bring to boiling; reduce heat.

2. Ladel out a cup of the beef stew broth into a small bowl and whisk in the flour. If the paste is too thick, add a little more broth until the paste is smooth. Pour the paste into the pot, whisking to blend well. (This paste will get the stew to thicken.)

3. Cover and simmer 1 to 1 1/4 hours for beef (30 minutes for pork) or till meat is nearly tender. Add potatoes, carrots, and celery. Cover; simmer 30 minutes more. Skim fat if needed.

Makes 4 main-dish servings.

*This recipe is adapted from the Better Homes & Gardens Cookbook.

Sunday, August 30, 2009

Jalapeno Cheddar Bread

Ooooooh, heavenly! I think this is the best tasting bread I've ever made, and that's saying something for me who has had so, so many loaves of bread fail into miserable little bricks.
I used this amazingly easy recipe featured in Mother Earth News magazine for "Artisan Bread in 5 Mnutes a Day." But before I stirred all the ingredients together, I tossed in some tiny diced jalapenos (from my garden!), and some shredded sharp cheddar cheese. It was so amazing! And not that spicy, which is good, because I can only handle so much heat. The jalapenos are important becuse they add such a delicious, wonderful flavor which the sharp cheddar compliments so well. TRY IT!


Jalapeno Cheddar Bread

Put bread ingredients in the bowl according to the bread recipe.

Before mixing, add in 1/4 - 3/4 cups of diced jalapenos depending on how hot you want it. (After baking, a lot of my jalapeno bits lost their heat.)

Shred about 1 cup - 1 1/2 cups sharp cheddar cheese and toss into the bowl. Stir, making sure to coat the cheese with the flour so the shreds don't stick all together. Mix according to bread recipe directions. Chill until ready to bake. Follow the rest of the bread recipe.

**Bakers note: I have had this bread come out doughy before. The best way to avoid this is to take the bread's temperature! As soon as it reaches 190º F deep inside the loaf, you know it's done.

Tuesday, August 11, 2009

Sticky Chicken

You want super easy and super yummy? Try this recipe out!

Sticky Chicken

1 lb. chicken breasts, skinned and deboned (or 2 regular-sized cans of chicken, drained)
1 cup apricot jam
1 cup fat-free Catalina salad dressing
1 pkg. dry onion soup mix

1. Cut chicken into thin strips. Saute in a skillet coated with cooking spray until lightly browned.
2. Combine remaining ingredients; mix well. Pour over chicken; bring to a boil. Reduce heat and simmer 10 to 15 minutes leaving lid slightly ajar. Serve over rice with your favorite veggies on the side.
3. Makes 6 servings.

Wednesday, August 5, 2009

Food Tip #1

So, I don't know how many food tips I have to offer, but I thought this one was worth mentioning. We'll see if I can think of some more to add to the list.

I don't know about you, but I am a person that is perfectly willing to eat the ends of loaves of bread... if there's no other bread in the house. I like crust. I just like the middle slices better, that's all. So what ends up happening is that bread packages with 2 end pieces accumulate in my fridge for weeks and (more realistically) months. Since they're refrigerated they don't get moldy too quickly either. After awhile, though, digging around the multitudes of bags gets annoying so I haul out my food processor and all the bread ends. Then I grind them all up into crumbs and Voila! Bread crumbs for future recipes. Then I put them all in a ziploc bag and stick them in the freezer until they're wanted. Or they get shoved to the back only to be forgotten all over again. Those poor bread ends...

But really. Having a fresh (frozen) supply of bread crumbs is a very smart thing to have and you don't have to buy these.

Tuesday, July 14, 2009

Cherry Pie Filling and Cherry Preserves

I had to write about my latest cooking escapade - canning cherries. I'd never done it before in my life, but when you get a canner for Christmas and have friends begging you to pick as many cherries from their tree as you can, then you get me - completely amitious. I think everything turned out rather well and I'm so proud of myself! I'd say that canning the preserves is far easier than canning pie filling because preserves requires chopping the cherries up in a food processor while the pie fililng requires you to blanch the cherries in water and to keep them hot while you make the filling. Yikes! I was surprised I had enough bowls.

Also, one important note: If you are ever going to make homemade fresh or canned pie filling don't use cornstarch! I mean it. Just don't. I canned apple pie filling last year using cornstarch and now it is all clumpy and separated. Instead, you should use this wonderful product called modified corn starch. It makes the most amazingly smooth and thick pie filling - just like you'd pour out of a can. It's just so much easier to work with and it's a lot more stable for canning. Give it a try! (I found it in the grocery aisle with the regular cornstarch.)

Anyway, here are some pictures:

The Cherries. Aren't they beautiful?


The pitted cherries floating in water and lemon juice. (Pitting takes a long, long time!)


I didn't get a picture of the cooking cherries, but here is the pie filling in the canner. Because of our elevation they had to cook for 40 minutes!


The finished cherry pie filling with a small jar of cherry preserves on the right. You can tell a big difference between the pie filling where I used water (on the left) and where I used cherry juice (in the middle). The flavor was quite different too. I can't wait to see how different they taste in a pie or a crisp! Yummy!


If anyone is interested in the recipes I used, just let me know. I have to transcribe it with my notes from the huge and overly detailed webpage from where I got it.


***And a BIG thank you to Clair and Damon for donating their cherries to me! :-) ***

Tuesday, June 16, 2009

Watergate Cake

Yes! Watergate inspired a cake. Actually, I think it was thus named because this recipe uses pistachio pudding and pistachio pudding became uber popular about the same time as the Watergate scandal.
Anyway, I absolutely love this cake. And I'm not a huge cake fan. There's something about pistachio pudding in a cake that makes me giggle.
So, without further ado -

Watergate Cake*

1 white cake mix
3 eggs
1 pkg. instant pistachio pudding (dry)
1 cup oil (or do 1/2 oil, 1/2 applesauce for less fat)
1 cup 7-Up
1/2 cup pecans, chopped
1/2 cup flaked coconut

Preheat oven to 350º F.
Prepare a 9x13-inch pan according to instructions on the cake mix box. Mix ingredients in order given, making sure to combine everything well. Pour the batter into the pan. Bake for 30-40 minutes until a toothpick inserted into the center comes out clean. Cool completely before frosting.

Frosting:
1 small container whipped topping
1/2 cup pecans, chopped
1 pkg. (3 oz.) instant pistachio pudding (dry)

In a medium bowl, dump in the whipped topping and fold in the chopped nuts and dry pudding mix until well combined. Use to frost the cooled cake. Keep frosted cake in the refrigerator.

Wednesday, June 10, 2009

Homemade Marshmallows

You can make homemade marshmallows?????? Why has this never occurred to me? I came across a cool blog post from Smitten Kitchen that talked about making homemade marshmallows. Check the recipe out through the link! It has awesome pictures. And I am going to make some today. YES!

Tuesday, June 9, 2009

Victorious Bread!


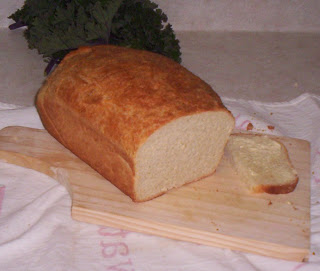
Isn't it beautiful?

I was so put out by the miserable brick of whole wheat bread that I made a completely different bread - using bread flour for the first time. I don't know if the bread flour made a difference, but the bread turned out awesome! I even had a slice of it for toast this morning (and I've never had bread good enough for toast before.) And I just can't get over how beautiful and golden it turned out. *rapturous sigh*

So, I had to share the recipe. I know there are thousands of bread recipes out there, but the one thing that stood out to me in this recipe is that it tells you to test the temperature of the inside of the loaf to determine if it's done. THANK YOU! I was always so frustrated with the "tap the loaf to see if it sounds hollow". What the heck is that supposed to sound like?? The bread-tapping method is like testing a watermelon. You knock it and listen and you think it sounds hollow, but you don't really know if it's good until you open it and when you do, it's too late! Darn tapping. Forget you! And it's a good thing I took the bread's temperature. I would have taken it out 10 minutes too early!

(I got this recipe from the bag of King Arthur flour.)

Oatmeal Bread

Makes good sandwiches and toast!

3 cups bread flour (I used King Arthur Unbleached Bread Flour)
1 cup old-fashioned rolled oats
2 Tbsp. butter or margarine
1 1/2 tsp. salt
3 Tbsp. brown sugar or honey
2 tsp. instant yeast or 1 packet active dry yeast*
1 1/4 cups lukewarm milk
3/4 cup raisins or currants (optional)
1 Tbsp. melted butter

*If you use active dry yeast, dissolve it in the warm milk before combining with the remaining ingredients.

In a large mixing bowl, combine all the ingredients with an electric hand mixer, mixing to form a shaggy dough. (I started with 1 cup of the flour, mixed everything and then mixed in the rest of the flour.) Knead dough, by hand (10 minutes) or by machine (5 minutes) till it's smooth. Place dough in a lightly greased bowl, cover and allow it to rest for 1 hour; it'll become quite puffy, though it may not double in bulk. 

Transfer the dough to a lightly oiled surface, shape it into a log. Place the log in a lightly greased 9 x 5-inch loaf pan, cover the pan (with lightly greased plastic wrap), and allow the dough to rise for 1 to 1 1/2 hours, till it's crested 1 to 2 inches over the rim of the pan. 

Gently brush the  melted butter on the top of the loaf. Bake the bread in a preheated 350ºF oven for 35 to 40 minutes, until an instant-read themometer inserted into the center registers 190ºF. If the bread appears to be browning too quickly, tent it with aluminum foil for the final 10 minutes of baking. 

Yield: 1 loaf

Sunday, June 7, 2009

Strawberry, Rhubarb, & Raspberry Crisp


Since strawberries and rhubarb are in season right now, I thought I'd post this recipe that I found at real-restaurant-recipes.com which I also tweaked a bit. I have never eaten or baked with rhubarb before. It's one of those intimidating plants that I've never ventured to experiment with. BUT a woman I bought eggs from at the farmers' market was selling some rhubarb, so I thought I'd give it a whirl! I just barely made this crisp. As it is still cooling I only took a little taste of the syrupy goodness and it tasted amazing! 
***Health Note: This is low in fat, but it has 1 1/2 cups of sugar total. I guess you can't always have everything! 
***For other non-dessert ideas using rhubarb check out this article from Mother Earth News!

Strawberry, Rhubarb & Raspberry Crisp

2 1/2 cups rhubarb, chopped in pieces
1/2 cup strawberries, sliced or chopped
1/2 cup raspberries, frozen or fresh
3/4 cups sugar
1 Tbsp. cornstarch
2 Tbsp. orange juice 

Topping:
2/3 cups old-fashioned oats
1/2 cup brown sugar, firmly packed
5 Tbsp. flour
1/2 tsp. cinnamon
1/4 tsp. salt
5 Tbsp. butter, margarine or butter/margarine blend
5 Tbsp. pecans or walnuts, chopped (optional)

1. Preheat oven to 375ºF. 
2. Butter or spray with cooking spray a 8 x 8 inch baking pan.
3. In a mixing bowl, combine and toss the rhubarb, strawberries, sugar, cornstarch, and orange juice. Transfer the mixture to the buttered baking dish.
4. Mix the oats, brown sugar, flour, cinnamon and salt in a bowl. Cut in the butter with a pastry blender or use your fingers until the mixture resembles coarse crumbs. 
5. Mix in chopped nuts and sprinkle over the fruit mixture.
6. Bake until the topping is golden brown and the fruit is bubbling, 30 - 35 minutes. 
7. Let cool and serve with whipped cream or vanilla ice cream, if desired.

YUM!


Saturday, June 6, 2009

Making Mistakes

So, I've had 3 baking mistakes or failed experiments in the past 2 weeks. Quite a trial to be sure. If anyone knows me, they've known I've been cooking for a long time and I can come out with some pretty tasty stuff. But not always. Here are the unluckies:

1. Mozzarella cheese - the recipe turned out some pretty tasty ricotta cheese, but not mozzarella. I'm pretty positive it was the milk, so I'm not to blame. ;-)
2. Applets & Cotlets - That's right, Aurora, my first attempt was a total screw-up! Okay, so it did set and they were tasty, but the blackberry flavor was a little strong. I should have added some applesauce to lighten it up a bit. Good thing blackberries were on sale...
3. 100% Whole Wheat Bread - This one escapes me every time!!! My bread was a solid, dense brick. Edible, but not that enjoyable. I don't get it. Is it the altitude? Do I not let it rise long enough? I made some white bread a week ago that was so delicious that I rapturously cherish the wonderful little recipe it came from. But wheat bread? Why, oh why must you be so elusive? Does anyone out there know how to make good whole wheat sandwich bread? I'm determined to not buy any more bread!

So, this just goes to show you that it doesn't matter how long you've been cooking or baking. Learning comes from mistakes. If you do make a mistake, or you use a dud recipe, just move on and hope the dog will eat the failed attempt. (Or that the husband and kids won't notice...)

Tuesday, May 26, 2009

Two Words for Amazing: Tarka Dhal

I've had a few requests, so here it is! This Indian recipe does have a lot of ingredients, but don't let that intimidate you! It is absolutely amazing,  yummy, healthy,  and completely addicting. You can serve it with warmed whole wheat tortillas, but making the chapti bread is worth it too. And very easy. 

Tarka Dhal 

 Ingredients

1/2 cup(s) dry red lentils, rinsed 
1 cup(s) water 
2 medium scallion(s), chopped (or 1/2 yellow onion, chopped) 
1 tsp yellow mustard seed 
2 clove(s) garlic clove(s) 
1/4 tsp fenugreek seeds, (8 seeds) 
1 tsp ground ginger 
1 cup(s) canned tomato sauce 
1/2 tsp sea salt 
2 medium tomatoes 
1 tbsp fresh lemon juice 
4 tbsp cilantro, chopped (optional) 
1/2 tsp garam masala 
1/2 tsp cayenne pepper 
1 tsp olive oil 

Instructions

1. In a pan, cook the rinsed red lentils with the water by bringing to a boil and then simmering with the lid on until the water is absorbed, about 30 minutes. The lentils will get very foamy, so use a large pan. You may need to vent the lid a little. 
2. In a non-stick pan saute the onions in the olive oil for 2-3 minutes. Add the mustard seeds and cover and cook until they start to pop. Add the cloves of garlic, crushed, the fenugreek seeds and ginger powder. 
3. Stir and add 1 can of tomato sauce. Add the salt and stir in the cooked lentils. Stir in the fresh tomatoes, diced, lemon juice and the fresh cilantro, if desired. Simmer for about 5 minutes. 
4. Place in a serving dish. Add the garam masala and cayenne pepper or chili powder. 
Serve with warm chapati bread or over rice. 

Saturday, May 16, 2009

Pasta + Herbs + Tomatoes + Lemonade = LOVE


I have to tell you about this amazing, yummy meal I made today. Somehow the cooking stars were aligned. :-) I had a fridge and a counter full of produce that I needed to use and I knew I wanted to make pasta with the fresh oregano and spinach I got at the farmers market today. This is what I did:

Stir fried one chopped onion, one chopped red pepper, and about 8 small tomatoes in olive oil. Then I chucked in the sliced spinach and cooked until it wilted. Added some salt and pepper. Then I opened two cans of crushed tomatoes and poured that into a pot. I added about a tablespoon of brown sugar and then added the veggie mixture. I then chucked in the chopped, fresh oregano, some of my cinnamon basil from my window herbs stirred it until it was heated and served it over pasta with our local cheese factory's Parmesan cheese. It was amazing!! And there was no meat, so the calories were pretty low. Then, we washed it down with homemade lemonade. I found the perfect mixture (for me anyway - not too sweet and just enough tart), so here's my recipe:

Amazing Lemonade

Juice from 8 lemons and 2 limes (should come to 2 cups of juice)
1 3/4 cups sugar
Enough water to make 1 gallon
1 Tbsp. fresh mint leaves, lightly crushed

Pour the juice in a pitcher with the sugar and some of the water. Stir until the sugar dissolves. Pour into your gallon container of choice, throw in the mint leaves and add the rest of the water. Chill and drink. YUMMY!

Saturday, May 9, 2009

Lamb Sausages with Mint, Feta, & Garlic

If you're feeling a bit adventurous and are tired of the same old meat, try this simple recipe that I found in Bon Appetit magazine. I had never tried lamb before and this recipe was really, really tasty! (I bet it could be adapted to make full-sized hamburgers too!)

Lamb Sausage Patties with Fresh Mint, Feta, & Garlic

1 1/2 pounds ground lamb shoulder (Leg meat is leaner. See if your local store butcher can grind it for you.)
2 large garlic cloves, pressed
1 1/2 tsp. coarse kosher salt
1/3 cup crumbled feta cheese
1 Tbsp. finely chopped fresh mint (fresh makes all the difference!)
1 Tbsp. extra-virgin olive oil

Place lamb in a large bowl. Sprinkle garlic and salt over. Gently toss lamb to blend. Combine feta and mint in a separate small bowl. 

Divide lamb into 12 equal mounds. Using damp hands, shape each into ball. Working with 1 ball at a time, poke thumb into center to make hole. Press 1 tsp feta-mint filling into hole. Pinch hole closed, then press ball between palms to flatten itno 3/4-inch thick disk. Repeat with remaining lamb and feta-mint filling.

Preheat oven to 250ºF. Heat olive oil in heavy large skillet over medium heat. Working in 2 batches, cook lamb sausages until browned on both sides and cooked to desired doneness, about 3 minutes per side for medium. Transfer sausages to rimmed baking sheet and place in oven to keep warm. Serve hot.

(Can be made 1 day ahead. Instead of cooking, transfer to baking sheet. Cover and refrigerate until you are ready to cook them the next day.)

**Note: These tend to have a lot of fat, so we cooked them on our George Foreman grill and they turned out really well and with less fat.

**2nd Note: The article's picture shows a plate with the sausages, a micro salad of mixed spring greens, a hunk of crusty baguette and some unpitted olives. We ate it exactly the same way and it made for a terrific lunch meal!

Garam Masala Update

Please note that I have made an update to the Garam Masala recipe. I couldn't find my exact recipe I used the last time I made it. So, I used one that I thought was the right one, but after making it I realized it didn't smell right. I went to a cooking store and looked at their garam masala - NO turmeric! Aaack! So, sorry about that. Don't add the turmeric or your garam masala will taste more like curry. Not what you want for this recipe. Sorry for the confusion.

Tuesday, May 5, 2009

Mughlai Chicken & Naan Bread

Now that you have a good garam masala recipe (see previous post), you need a few good Indian recipes to put it in! Here is the first installment. Making naan bread for it isn't necessary, since you can serve the chicken over brown rice, but who would be that silly to not make the naan bread? Naan is absolutely amazing (especially the next day, toasted in the toaster and spread with butter... YUM!)
The following recipe is from the Food Network website with a few tweaks of my own.

Mughlai Chicken

Ingredients

  • 1 (1-inch) piece ginger, peeled or 1 Tbsp. ground ginger
  • 4 cloves garlic, peeled or 2 Tbsp. minced garlic
  • 2 teaspoons ground cumin
  • 1 teaspoon ground coriander
  • 1/2 teaspoon dried chili flakes
  • 4 tablespoons ground almonds
  • 1/2 cup water
  • 5 cardamom pods, bruised or 2 tsp. ground cardamom
  • 1 cinnamon stick, broken in half
  • 2 bay leaves
  • 4 cloves
  • 1/4 cup vegetable oil (or less if you'd like)
  • 3 pounds boned chicken thighs, each cut into 2
  • 2 onions, finely chopped
  • 1 cup Greek yogurt or regular plain yogurt
  • 1 cup chicken stock (I used broth)
  • 1/2 cup heavy cream (I'm using 1% milk next time - it was way to greasy)
  • 1/2 cup sultanas (golden raisins) - a MUST
  • 1 teaspoon garam masala
  • 1 tablespoon sugar
  • 1 teaspoon salt
  • 3/4 cup flaked almonds, toasted, to garnish

Directions

Put the ginger, garlic, cumin, coriander, and chili into a food processor, or into a mortar and pestle, and blend to a paste. Add the ground almonds and water and then blend again, set aside.

Heat the oil in a large pan and add the chicken pieces - in batches so they fry rather than stew - and cook them just long enough to seal on both sides, then remove to a dish.(They will not be cooked all the way, but that's okay!)

On medium-low heat, add the spices and turn them in the oil. Be careful to not let it burn. Add the onions and cook them until softened and lightly browned, but keep the heat gentle and stir frequently, to avoid sticking. Pour in the blended paste, and cook everything until it begins to colour, about 3-5 minutes. Add the yogurt, half a cup at a time stirring it in to make a sauce, then stir in the stock, cream, and sultanas.

Put the browned chicken back into the pan, along with any juices that have collected under them, and sprinkle the garam masala, sugar, and salt over. Cover and cook on a gentle heat for 20 minutes, testing to make sure the meat is cooked through.

Pour into a serving dish and scatter with the toasted flaked almonds. Serve with brown rice and/or naan bread.

**Note: I like to cook my brown rice with a 1/2 tsp of turmeric to give it a lovely golden color and chicken broth instead of water.


Naan Bread
(from allrecipes.com)
This bread is a little extra work, but I think it is sooooo worth it!
  • 1 package active dry yeast
  • 1 cup warm water
  • 1/4 cup white sugar
  • 3 tablespoons milk
  • 1 egg, beaten
  • 2 teaspoons salt
  • 4 1/2 cups all-purpose flour (I ended up only using 3 cups white flour and 1/2 cup wheat flour)
  • 2 teaspoons minced garlic (optional) (I didn't do this)
  • 1/4 cup butter, melted

DIRECTIONS

  1. In a large bowl, dissolve yeast in warm water. Let stand about 10 minutes, until frothy. Stir in sugar, milk, egg, salt, and enough flour to make a soft dough. Knead for 6 to 8 minutes on a lightly floured surface, or until smooth. Place dough in a well oiled bowl, cover with a damp cloth, and set aside to rise. Let it rise 1 hour, until the dough has doubled in volume.
  2. Punch down dough, and knead in garlic, if desired. Pinch off small handfuls of dough about the size of a golf ball. Roll into balls, and place on a tray. Cover with a towel, and allow to rise until doubled in size, about 30 minutes.
  3. During the second rising, preheat grill to high heat.
  4. At grill side, roll one ball of dough out into a thin circle. Lightly oil grill. Place dough on grill, and cook for 2 to 3 minutes, or until puffy and lightly browned. Brush uncooked side with butter, and turn over. Brush cooked side with butter, and cook until browned, another 2 to 4 minutes. Remove from grill, and continue the process until all the naan has been prepared.
**Note: To cut back on fat I used a lower calorie butter spread which worked fine.


Coming Next: Tarkh Dahl & Chapati Bread

Garam Masala

If you like Indian food, then you need a good garam masala recipe. Garam masala is a spice mix called for in many Indian dishes and cannot be lived without! It's best not to buy it pre-made because who knows how much of what went in there and there's no way to customize it for yourself. And that is the beauty of garam masala - customization.
So, here' my own recipe that is more simple than some.

Garam Masala

2 Tbsp. coriander
2 tsp. ground cumin
1 Tbsp. ground cardamom
1 Tbsp. ground cinnamon
2 tsp. ground cloves
2 tsp. ground nutmeg
1/2 tsp. allspice
1/2 tsp. cayenne
1 tsp. black pepper

Mix until well combined. Keep in an airtight container or spice jar in a cool, dry place.

Thursday, April 9, 2009

Beans on Toast

I had to give a little tribute to one of my most favorite recipes. I "stole" the idea for British-style beans on toast from the movie Bend It Like Beckham. It is so simple, light, low fat and tasty!
Give it a try!

Beans on Toast

2 slices of your favorite bread
Favorite buttery spread (butter, margarine, Smart Balance, etc.)
1/2 cup favorite baked beans (In my opinion, nothing can compare to Bush's Vegetarian Baked Beans.)

1. Heat up the beans in a small pot or in the microwave.
2. Toast one slice of bread so that it is really golden. Not, what I like to call "raw" toast, but good and crunchy. It needs to be crunchy to resist getting soggy from the beans.
3. While the toast is hot, spread on your favorite butteriness. Put the toast on a plate and add half of the beans. Eat and relish the amazing flavors.
4. Toast the second slice of bread and repeat steps 2 and 3. (The hot toast makes all the difference, which is why I only toast one slice at a time.)

Yummy!

Tuesday, March 24, 2009

Citron-Semoule de Maïs Madeleines


Okay, so I got a little fancy with the name. I just thought "Lemon-Cornmeal Madeleines" sounded so boring and thought French would spice it up a bit. I found this recipe in a Weight Watchers cookbook and made a few changes. Anyway, this is my new favorite recipe! It is easy, delicious, refreshing and low fat. I think these would be perfect for a wedding reception or a tea. These madeleines are basically a cross between a mini muffin and a cookie and go perfectly with a cup of your favorite warm beverage or a bowl of strawberry ice cream.

Citron-Semoule de Maïs Madeleines

1 lemon
1 egg white
2 Tbsp. water
4 Tbsp. powdered sugar, sifted
1 (8 1/2-ounce) package corn muffin mix (dry)
2 Tbsp. butter, melted

1. Preheat the oven to 375ºF. Spray 48 mini-madeleine molds, 2 (12-cup) mini-muffin pans, OR 2 (12-cup) regular-sized muffin pans with non stick spray. (I used the regular muffin pans and it worked great.)

2. Grate 1 tsp. of the zest from the lemon; squeeze 3 Tbsp. of juice, set aside. Combine the egg white and 2 Tbsp. water in a medium bowl, beating with a whisk until blended. Stir in the lemon zest, lemon juice, and 2 Tbsp. of the powdered sugar. Add the melted butter and the muffin mix; stir just until blended. (I found that using a whisk to stir gave the muffins a finer crumb.)

3. Spoon the batter into the muffin cups. (I used a tablespoon measuring spoon, filling it 3/4 full for each muffin cup to be sure the batter would stretch for all 24 muffin cups.) Bake until the edges are golden and the tops spring back when lightly pressed in the center, about 8 minutes. Immediately invert the madeleines on racks and let cool. Using a seive, sprinkle the remaining 2 Tbsp. of powdered sugar onto the tops of the madeleines just before serving.

Makes 12, 2-madeleine servings.

**Note: These are great fresh. I put the leftovers in a sealed plastic container on the counter and they lost their crunchy edge, making them taste more like muffins. I didn't like them too much that way, but they were still good. So, for an experiment I left the rest of them out on the counter for about 2 days with the lid off and they dried out, becoming a lemony, crunchy cookie. I think they tasted great! You might want to experiment to see how you like them best.

**Another note: An idea I had was instead of sprinkling them with just powdered sugar, mix some of the extra lemon juice with the powdered sugar and use it as a glaze.... Yum! I think I'll try this next time.

Saturday, March 14, 2009

Banana-Raspberry Bread


Aaah! The most wonderful way to use up over-ripe bananas. I like plain banana bread pretty well, but this version is wonderful! The raspberries add just the right amount of tartness to contrast with the mellow taste of the banana. This recipe is adapted from The Joy of Cooking (I added the raspberries to the recipe and made a few other adjustments.)

Banana-Raspberry Bread
(adapted from The Joy of Cooking)

1 1/3 cups all-purpose flour
¾ tsp. salt
½ tsp. baking soda
¼ tsp. baking powder

5 1/3 Tbsp. unsalted butter, softened to room temperature
2/3 cup sugar

2 large eggs, lightly beaten

1 cup mashed, very ripe banana (about 2)
½ cup coarsely chopped walnuts or pecans (optional)
½ -1 cup frozen raspberries (in pieces and whole)

1. Preheat the oven to 350ºF. Grease an 8 1/2 x 4 1/2 loaf pan.

2. Whisk together the dry ingredients in a medium-sized bowl and set aside.

3. In a large bowl, beat the butter and sugar on high speed with an electric mixture until lightened in color and texture, 2-3 minutes.

4. Beat in the flour mixture until well blended and is the consistency of brown sugar. Gradually beat in the eggs. Finally, fold in the banana, walnuts if desired, and frozen raspberries, just until combined. (Baker's Note: Keep the raspberries in the freezer until you're ready to add them to the batter. Otherwise, you'll end up with red streaks and raspberries that fall apart as you're stirring.)

5. Scrape the batter into the pan and spread evenly. Bake until a toothpick inserted in the center comes out clean, 50 to 60 minutes. Let cool in the pan on a rack for 5 to 10 minutes before removing from the pan to cool completely on the rack.

Baker's Note: As tempting as it is, don't cut this bread until it has cooled down for at least a half hour to an hour. When it's removed from the oven, it's still cooking and contains a lot of moisture. We want to let that process wind down on its own without letting a lot of the moisture escape. The wait is well worth it!

Thursday, March 5, 2009

Recipe Requests

I had a few requests for recipes so here they are!

Tuna Loaf

This is a good change from beef meatloaf, especially if you love tuna. Using foil during the baking really helps keep this loaf moist. You can make this recipe using salmon as well. Some day I'll have to try making this with fresh, broiled tuna. Yum!

1/2 cup onion, finely chopped
2 tsp. dried dill weed
2 tsp olive oil
2 large eggs, slightly beaten
2 cups whole wheat bread crumbs
1/2 cup fat-free skim milk (powdered milk would work here)
4 6-oz. cans of tuna, drained and broken into chunks

1. Preheat oven to 350ºF. Oil a regular-sized bread loaf pan with a little extra olive oil or some cooking spray.
2. Saute onions and dill weed in a saucepan with the olive oil until onions are tender.
3. Add eggs, bread crumbs, milk and tuna. Stir until everything is well distributed.
4. Pour the filling into the bread pan, spreading the top to make it even without pressing the filling down too much. (We don't want it to be dense!)
5. Cover the top with aluminum foil (to keep it from drying out) and bake for 30-35 minutes. Let it cool about 5 minutes with the foil off before serving. Good with tartar sauce or Italian dressing.


Spinach Artichoke Dip

A classic recipe good for dinner or an appetizer.
Thank you, Janae! I hope you don't mind me posting this - I've had a number of requests for this recipe. Everyone loves it!


8 oz. (1 package) reduced-fat "neufchatel" cream cheese, softened
1 cup light mayo
1 cup light sour cream
1 cup grated Parmesan cheese
1 14-oz. can artichokes (in water), chopped and drained
1 small package frozen spinach, thawed and drained
1 garlic clove, pressed
1 tsp. dill
1/8 tsp. salt

1. Preheat oven to 375ºF. Oil a medium-sized, deep baking dish with olive oil or cooking spray.
2. Combine all ingredients in a large bowl by hand or with a hand mixer. Pour into baking dish, using a spatula to get all of the dip out of the bowl.
3. Cover baking dish with foil and bake for 50-60 minutes. Serve with your favorite corn chips or a good French baguette.


Friday, February 27, 2009

A Little Recipe Organization

If you love cooking like me, then you have a zillion recipes floating around your house - stuffed into folders, crammed into beat-up cookbooks or earmarked in favorite cooking magazines. I like being organized and not being able to find recipes that I use constantly was getting to be frustrating. So, I came up with a few organizing ideas.

1. To cut down on magazine-mania, I went through my cooking magazines, cut out the recipes I wanted to keep or that I realistically knew I would actually make some day and slipped them into page protectors and stuck them in a binder. I chucked the rest of the magazines but did keep the magazines that were chock full of amazing recipes.

2. Now I have 2 binders. One binder (okay, one and a half - the first one overflowed) contains recipes that I have yet to try, but still interest me. The other binder is full of the recipes that I have tried and that I actually like. (Why keep a recipe everyone hated?) That way, when I want to make an old favorite, I don't have to flip through countless page protectors of gorgeous food pictures and 10 different pumpkin pie recipes to find the Sticky Chicken recipe I want.


Do you have any recipe organization tricks? Post a comment and let us know! I know I can use all the suggestions I can scrape in.

Wednesday, February 25, 2009

Greek Sesame Candy


Sesame candy was always a treat I liked to get when we went to the health food store, but the downside was that it was so expensive! I was thrilled to find this fun, tasty, and really easy recipe that I could make at home. It's not too sweet and just really hits the spot. It's crunchy, chewy and it's great to share. I hope you enjoy it! (I found this recipe through www.epicurious.com.)

"There are many variations of sesame honey candy from around the Mediterranean and the Middle East - some are hard and crunchy; others, like this Greek version, are chewy. This pasteli is sticky, but [using waxed paper sprayed with baking spray] will help you unmold the candy with ease."

Ingredients:
1 cup mild honey
1 cup sesame seeds, toasted in oven (I had pre-toasted seeds on hand that I used)
1/2 tsp. salt

Place wax paper on a large shallow baking pan (1 inch deep). Remove the bottom of a springform pan and set aside. Place the springform ring upside-down on the wax paper and spray the inside of the ring - wax paper and lower edge of ring - with cooking spray.

Bring the honey, sesame seeds, and salt to a boil in a 2-quart heavy saucepan over moderate heat, stirring. Then boil undisturbed until mixture registers on thermometer, about 10-15 minutes. (I live at a higher elevation and it only took 10 minutes. Any longer would have been a bad thing.)

Holding the ring in place, quickly pour the mixture into the ring, then cool on a rack until candy is set but still warm - about 30 minutes. Unmold by opening the springform ring (the candy should pop out) and peeling off the wax paper. Transfer candy to a cutting board. Cut the candy into 1-inch pieces with a large oiled knife, or if the candy is too hard, break into medium-sized pieces. Candy keeps, layered between sheets of parchment or wax paper in an airtight container in a cold dry place for 1 week.

Sunday, February 1, 2009

Hush Puppies


Cornmeal makes me happy on levels I can't even describe. I guess, for me, it's a soul food. So, I'm posting one of my ultimate favorite recipes that I've tweaked to be healthier. (Originally, you're supposed to fry them in oil.) These hush puppies can be served with breakfast - I just had them with eggs and a bowl of strawberries. Delicious! You can also eat them as a substitute for cornbread with chili or any fish dish. They're just fabulous and really good for you!

Hush Puppies

1/2 cup onion, finely chopped
1 clove garlic, peeled and minced
2 cups yellow cornmeal (I think coarser meal is better, but whatever you have on hand.)
3/4 cups whole wheat flour
2 tsp. baking powder
1 Tbsp. sugar
1 1/2 tsp. salt
1 3/4 c. fat-free milk (I used reconstituted non-fat powdered milk.)
1 Tbsp. canola oil
1 large egg

Place the onion and garlic in a food processor and pulsate until finely chopped. Separately mix the cornmeal, flour, baking powder, salt and sugar together. Add the onion mixture along with the egg, milk, and oil. Stir until well blended. (If the dough is too stiff, add a little more milk. If you live in a more humid climate, you might not need as much milk.)
Spray a flat pancake grill with cooking spray. Pour about 1/4 cupful (or 1/3 of a ladelful) servings onto the grill when it is hot. Cook until golden, crispy brown on one side. Flip to cook the other side until golden. The hush puppies should cook about 3-5 minutes on each side.

Makes about 16 hush puppies.

Note: You can experiment by adding spices you like such as black pepper, cayenne pepper, basil, paprika, extra garlic or even cheese!

Sunday, January 11, 2009

Pennsylvania Red Cabbage


I am always looking for new vegetable recipes that I like and will actually eat. One veggie that makes me sublimely happy (and don't ask me why - I have no idea!) is cabbage. I absolutely love it! Red cabbage's gorgeous purple color makes me extra happy and since I had one sitting in the veggie drawer of my fridge I decided to find a recipe dedicated to the little head. And I found one! (In my Better Homes and Gardens Cookbook.) And without further ado, here it is!

Pennsylvania Red Cabbage

2 Tbsp. brown sugar
2 Tbsp. vinegar
1 Tbsp. canola oil
1/4 tsp. caraway seed (opt.)
2 Tbsp. water
1/4 tsp. salt
Dash of pepper
2 cups shredded red cabbage
3/4 cup coarsely chopped apple

In a large skillet stir together the brown sugar, vinegar, oil, caraway seed, water, salt, and pepper. Cook for 2 to 3 minutes or till hot, stirring occasionally. Stir in cabbage and apple. Cook, covered, over medium-low heat for 10 to 12 minutes or till crisp-tender, stirring occasionally. Serves 3 to 4. (Or makes 2, one cup servings.)

Friday, January 2, 2009

Chalupa Goop


Well, it's actually called "Mexican Chalupas", but my husband and I just started calling it "Chalupa Goop" because it rhymed and sounded funny. :-) This stuff is so good and super easy to make. You can eat it in a tortilla, over rice, on a salad or just plain with tortilla chips. You decide! I got this recipe from my mother-in-law and it's been a family favorite ever since.
Also, if you're into food storage, this recipe uses everything that is food storage-friendly, and it also freezes really well. How much more perfect could you get?

Chalupa Goop

1 small picnic pork or 2 cans of chicken, drained (We use the chicken.)
1 tsp. garlic powder
1 tsp. cumin
1 tsp. chili powder
1 large can chopped green chilies
16 oz. jar picante sauce (it looks like salsa, but it's runnier)
16 oz. jar green salsa (salsa verde)
2 cans pinto beans
1 can diced tomatoes, with juice (opt.)

Add everything into a crockpot, or if you're in a hurry, cooking it in a pot works too. Heat until warm. Serve on warm torillas and garnish with cheese, sour cream, and lettuce.

Low-Fat Cinnamon Buns


I found this wonderful recipe for cinnamon rolls! This recipe uses no butter!! The bread is tender and delicious and the filling is extraordinary! I just had to share it. It is a Weight Watchers recipe, and I believe you can actually get the recipe from their website. (I have made a few adjustments that I thought necessary.)

Low-Fat Cinnamon Buns

1 cup fat-free skim milk (I used powdered milk.)
1 Tbsp. canola oil
1 Tbsp. sugar
1 tsp. salt
1 Tbsp. yeast, about 1 package
2 1/2 cups all-purpose flour, sifted, divided
1/4 cup unpacked brown sugar
1/4 cup dark corn syrup
2 tsp. ground cinnamon
1/8 tsp. ground nutmeg (I put in 1/4 tsp.)
1 tsp. orange zest, grated (opt.) (I put in about 1/4 tsp. and the orange flavor was really pronounced.)
1/4 cups raisins, dried cherries or cranberries (I skipped these.)

Stir together milk, canola oil, sugar and salt in a small saucepan. Heat on low to lukewarm. Pour yeast over 2 tablespoons lukewarm water and let sit 5 minutes. Stir into milk mixture.

Transfer warm milk to a large mixing bowl and beat in half the flour by hand or with an electric mixer. Mix in enough remaining flour to make a soft dough. Let rest 10 minutes; knead well on a floured board or with an electric mixer and dough hook. Let rest 10 minutes.

Spray a large, clean bowl with cooking spray, add dough, cover with plastic wrap and let rise in a warm place until doubled, about 1 hour.

Lightly coat a 9-inch round baking pan with cooking spray. (I needed two 9-inch round baking pans - 12 rolls don't fit in a 9-inch pan with room enough to rise.) Turn the dough onto a floured surface and roll into a 12 x 10-inch rectangle. Spray with cooking spray.

Stir together brown sugar, corn syrup, cinnamon, nutmeg and orange zest; brush over dough. (Too thick to brush, so I spread it with a spatula. Also, I'd recommend pouring a 1/3 of the filling into the baking pans and using 2/3 for the filling. I found that if I used all of it, the filling would ooze out a lot as I was cutting the rolls, as if it was too full.) Sprinkle with raisins. Roll up tightly, like a jelly roll. Cut into 12 pieces. (A trick I do is to use a length of thread to cut the rolls. Thread doesn't press the dough down, causing more filling to squish out. Simply place the thread underneath the roll where you'd like to cut, cross the thread and pass one end under the other - like you're starting to tie your shoes. Then pull both ends until the dough is cut through. Easy!)

Place buns cut-side up in baking pan. Cover with plastic wrap and let rise until doubled, about 1 hour. Preheat oven to 350ºF. Bake buns until firm and nicely browned on top, 30 minutes. Cool for 15 minutes before inverting onto a serving plate. YUM! (These rolls don't really need a frosting at all!)

Pecan Cinnamon Sticky Buns variation (as seen in the picture above)
After you spray the cooking pan with cooking spray, drizzle the 1/3 of the filling over the bottom of the pan. Then sprinkle on about 1 Tbsp. of brown sugar to fill in the gaps. Next, sprinkle about a 1/2 cup of pecan pieces evenly over the filling and brown sugar. Then, just place the cut cinnamon rolls right on top of the pecans/sugar mixture. Rise and bake as normal. After cooling, make sure to invert onto a plate because the gooey, yummy stuff will harden like candy and will make it really hard to get the rolls out or to scrape off the extra from the pan.
I just made this version today and it was AMAZING! And I really mean AMAZING!